
Soil, Sunlight, and Spacing: Growing a Productive Vegetable Garden in a Small Yard
You do not need acres to grow your own food. Learn how soil preparation, light mapping, and smart plant spacing help small yards produce a real harvest.
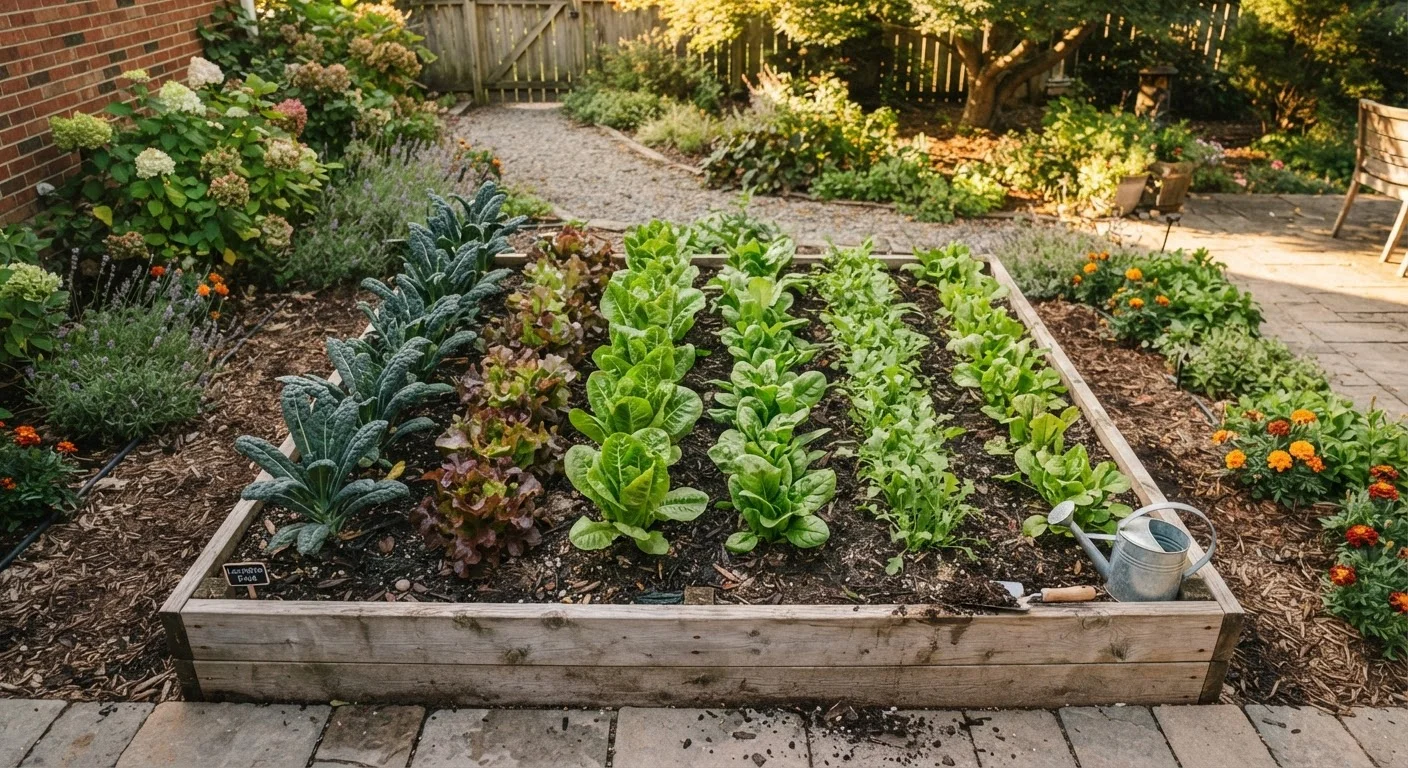
Photo: clearvisionmethod.net editorial
—— In This Article
Key Takeaways
- Six or more hours of direct sun daily is the minimum most vegetables need to produce well.
- Amending native soil with compost before planting improves drainage, nutrients, and root growth.
- Tight plant spacing without air circulation invites disease, so follow label recommendations.
- Vertical growing and succession planting double a small yard's effective output.
- Container gardening on patios or steps can supplement or replace in-ground beds.
Why small yards can still produce real food
A 4-by-8-foot raised bed, managed well, can grow enough tomatoes, greens, and herbs to cut a meaningful portion of a family's grocery bill through the growing season. The constraint is not size; it is the mismatch between a site's actual conditions and the crops planted there. Getting soil, light, and spacing right from the start determines whether a small garden becomes productive or just decorative.
Container gardening on a porch or patio extends the same principles to homes with no ground bed at all. A 5-gallon bucket grows one tomato plant. A half-barrel accommodates a mix of herbs and lettuces. If your exterior space is limited or you are thinking about how plantings affect your home's overall look, see our exterior update ideas for ways to integrate edible plants into a front yard without sacrificing appearance.
Start with a simple three-crop plan
New gardeners who try to grow a dozen vegetables at once often end up managing none of them well. Picking two or three crops you actually eat keeps maintenance manageable and teaches you the rhythm of your space before you expand. Lettuce, green beans, and tomatoes are reliable starting points in most US regions.
What you need before you start
Gathering the right information and materials before your first planting day prevents the most common beginner mistakes, especially buying plants that do not suit your conditions.
What you will need
Garden trowel
Digging planting holes and mixing soil amendments into the top layer of your bed.
Soil test kit
Measuring pH and basic nutrient levels so you add only what the soil actually needs.
Tape measure
Marking accurate plant spacing to avoid crowding and improve air circulation.
Compost or aged manure
Improving soil structure, drainage, and organic nutrient content before planting.
Garden stakes and twine
Training vining crops like cucumbers or pole beans to grow vertically and save ground space.
Raised bed frame (wood or galvanized metal)
Containing amended soil above poor native ground, improving drainage and warming soil faster in spring.
Check your soil before adding amendments
Adding fertilizer or lime to soil you have not tested can cause more harm than good. An inexpensive soil test kit from a garden center or your local cooperative extension office tells you the pH and nutrient levels before you spend money on amendments. Many extension programs offer free or low-cost testing services. Fix what the test shows, not what you guess.
Step-by-step: setting up your small vegetable garden
Follow these steps in order during the weeks leading up to your region's last frost date. Soil preparation takes the most time and pays the most dividends.
Map your sunlight over one full day
Walk your yard at 8 a.m., noon, and 4 p.m. and note which spots are in full sun, partial shade, or full shade at each check. A spot that looks sunny in the morning may be shaded by a fence or tree by mid-afternoon. Most fruiting vegetables, including tomatoes, peppers, squash, and beans, need 6 to 8 hours of direct sun to produce well. Leafy greens like lettuce and spinach can manage on 4 to 5 hours, making them good candidates for shadier corners.
Test and prepare your soil
Dig down about 6 inches in your chosen bed area and examine the soil. Sandy soil drains too fast and loses nutrients quickly. Dense clay holds water and suffocates roots. Most vegetable gardens do best in loamy soil with a pH between 6.0 and 6.8. Use a soil test to confirm where you stand, then work in 2 to 3 inches of compost across the surface and turn it into the top 8 to 10 inches with a fork or tiller.
Plan your layout using square-foot spacing
Square-foot gardening divides a bed into 1-foot squares, with each square holding a specific number of plants based on their mature size. One tomato or pepper fits in a square. Four lettuce heads, nine spinach plants, or sixteen radishes can share one square. Draw your layout on paper before buying plants. Put tall crops like corn or trellised cucumbers on the north side of the bed so they do not block sun from shorter neighbors.
Build up vertically to save ground space
Crops that vine or climb take far less ground space when trained upward. Cucumbers, pole beans, small squash, and peas all grow well on a simple trellis made from stakes and twine or wire fencing. A 4-foot-tall trellis attached to the north edge of your bed lets you grow climbing crops without blocking light, and it keeps fruit off the soil where rot and pests are more common.
Plant and water in correctly
Dig each hole to the depth specified on the seed packet or plant tag. For transplants, set them at the same depth they sat in their nursery container, with one exception: tomatoes can be buried deeper because they form roots along their buried stem. Water each plant in immediately after planting using a gentle stream at the base. This settles the soil around the roots and removes air pockets. Apply a 2-inch layer of mulch around (not touching) each plant stem to hold moisture and slow weeds.
Use succession planting to extend your harvest
Instead of planting all your lettuce or radishes at once, sow small batches every two to three weeks. This staggers the harvest so you are not flooded with produce one week and nothing the next. When a cool-season crop like spinach finishes in early summer, remove it and replant that square with a warm-season crop like bush beans or basil. A small bed managed this way can produce continuously for five to six months in most US climates.
Avoid overwatering young transplants
Soggy soil around newly planted seedlings invites root rot and fungal problems. Water at the base of the plant, not the leaves, and let the top inch of soil dry before watering again. Consistent moisture matters more than frequent watering.
Keeping the garden productive through the season
Once plants are in the ground, consistent maintenance is what separates a harvest from a disappointment. Check plants every two or three days. Remove yellowing leaves promptly because they harbor fungal spores. Pull weeds when they are small; large weeds compete directly with vegetables for water and nutrients.
Fertilize lightly about four weeks after planting using a balanced granular fertilizer worked into the soil surface, then water it in. Avoid overfertilizing with nitrogen: leafy plants will produce lush foliage at the expense of fruit. If you notice insect damage, identify the pest before treating. Many common garden insects, including ladybugs and ground beetles, are beneficial and should not be disturbed.
At the end of the season, cut spent plants at soil level rather than pulling them. Leaving roots in place preserves soil structure and the microbes around them. Add the cut material to a compost bin if it shows no sign of disease, and top the bed with a fresh inch of compost before winter to feed the soil for next year.

Home & Garden Editorial Team
Home & Garden Editorial Team is the collective byline for our editorial team and contributor network. Articles published under this byline or an editorial pen name are researched, written, and reviewed according to our editorial standards for clarity, consistency, and independence before publication.
View author profile